
Masonry is beautiful, but even the best brickwork can crumble if it isn’t properly maintained. Taking care of masonry damage as soon as it occurs prevents further issues from developing and saves money in the long run.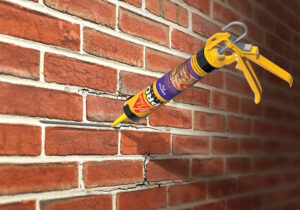
Masonry Repair Charleston SC is usually more cost-effective than a full restoration. It involves filling cracks and repairing damaged brick or stone.
Masonry is a method of building with bricks and mortar, creating the beautiful city buildings you see in older neighborhoods. Over time, these structures can develop cracks in their brick and mortar that need to be repaired to ensure their structural integrity.
The first step in masonry repair is to clean the cracked mortar joints. This can be done using a wire brush to remove larger loose particles or by manually removing a thin layer of mortar in the crack with a hammer and chisel. Once the cracks are cleaned, it’s important to let the area dry out. Once the mortar is dry, a chisel and hammer can be used to split the mortar in the crack into two pieces and then sand down the ends of each piece to make sure they are flat. Then, mortar patching material can be used to fill the voids in the cracks.
It’s also important to note that cracks in brick and mortar do not always mean the structure is failing or needs to be restored. In some cases, the cracks are caused by shifts in moisture, which can cause the brick and mortar to expand and contract. The expansion and contraction can cause the masonry to shift, which is normal for these types of structures.
Cracks in brick and mortar can also occur from movement in the ground underneath a building. This can happen as a result of freezing and thawing soil or when a home settles. This movement can cause the masonry to crack, which can lead to other problems such as draughts.
The most common type of masonry repair is repointing deteriorated mortar joints. This can include removing and replacing deteriorated bricks, cleaning the mortar joint, and repairing damage to the face of the brick. Another common type of masonry repair is the replacement of shelf angles and lintels, which are often found in older masonry structures and are vital for the stability of these walls.
SSRG can help repair any damaged brickwork or masonry structure, from homes and offices to historical landmarks. We have the experience and tools to make sure that your brickwork is in great shape for years to come. Give us a call today for competitive prices and superior work.
Repointing
Bricks and mortar are incredibly durable materials, but even the most solid structures need maintenance. Masonry professionals use repointing to repair cracks in brick walls, chimneys, foundations, and other masonry structures. This process involves removing deteriorated mortar and replacing it with new mortar that is identical in appearance to the original.
Repointing is a vital procedure that helps to keep brickwork looking good and helps to save the bricks from the worst effects of weathering and erosion. Masonry experts recommend repointing as soon as the mortar shows signs of aging, especially when it is spongy or soft to the touch. This is a key sign that the mortar will erode faster than the bricks themselves and can help save them from damage.
There are many different types of mortar used in building construction, but the type that is most commonly used for repointing is Type O, also known as high lime mortar. This type of mortar is softer than cement-based mortar and is designed to allow the bricks to expand and contract with changes in temperature. It is very important that the new mortar match the original masonry in both appearance and texture to avoid creating an unsightly dissonance in the structure’s appearance.
Using the right type of mortar is crucial to a successful repointing project, and it is important to know what kind of binder was used when the masonry was built. This will allow a professional to replicate the original material and ensure that the repointing job is done properly.
Although brick and mortar are very durable materials, they are not impervious to water. If you are experiencing problems with leaks or dampness in your home, it could be a sign that the masonry needs repointing. It is recommended that you have a professional assess the situation and advise you on what the best course of action will be.
While brick chimneys and basements are the most common masonry structures that need repointing, it is a good idea to have a professional examine any masonry structure that you suspect is damaged. It could be a simple case of needing repointing, or there may be underlying issues that require further work. For example, a crumbling set of brick stairs is likely to be beyond repair and would need to be torn down and replaced with new ones.
Tuck Pointing
Brick is a popular construction material, but even the best-laid brick can eventually need repairs. When it comes to masonry repair, two options are repointing and tuckpointing. While repointing is the process of digging out mortar joints and replacing them, tuck pointing is more precise and only adds new mortar to damaged areas of your brick wall.
Tuck-pointing is also typically less expensive than repointing, but it should still be done by a professional mason. This labor-intensive process requires extreme precision to create level mortar joints. If your mortar is off-kilter, it will look sloppy and disjointed.
In addition to making your brick building look better, tuck pointing also protects it from water damage and weathering. If the mortar between your bricks is cracked and disintegrating, water can seep through the bricks and cause damage to the interior walls. Re-tucking your brick walls can prevent this and keep your home or office safe.
The first step in tuck pointing is to clean the existing mortar joints with a masonry brush or a power grinder with a chisel attachment. This is important to make sure that all of the dirt, dust, and other debris are removed from the joints. This will make it easier to work with the wet mortar later on. Next, mist the wall with water until it is damp and starts to drip. This is critical because dry materials suck the moisture out of new mortar and prevent it from curing properly.
Masonry repair experts recommend using a premium tuck pointer that has a tapered blade for sturdiness and flexibility. It is also crafted from a single piece of steel for durability and features a high shank and lift to allow you to reach hard-to-reach spots. Using a tuck pointer with an extension allows you to reach even higher places.
Once the tuckpointing is complete, wait for the mortar to completely dry before painting. Usually, this takes about 2 weeks in warm and sunny weather. If you skip this step, your paint will suck the moisture out of the new mortar and prevent it from curing properly.
Removing Bricks
Bricks are tough and durable, but they’ll crumble into dust without a proper bed of mortar to seal them. When you see fissures forming in the mortar joints on your brick wall or notice that existing mortar is falling out of the joints, it’s time to chisel out the old and trowel in the new, a process called repointing. Tuck pointing is a relatively simple task for a masonry expert, but it requires the right materials and techniques to ensure you don’t damage the surrounding bricks.
Before you start removing bricks and mortar, it’s important to study the existing brickwork carefully so you can replicate its style in your repointing project. Masonry specialists use a variety of tools to accomplish this task, from hand hammers and cold chisels to lime mortars similar to those used by masons 100 years ago. It’s also critical to pay close attention to the mortar joints, since these are where the most moisture is found in a brick structure.
This Old House recommends grinding the top and bottom of the horizontal (bed) joints with an angle grinder to prepare the surface of the brick for repointing. Be careful not to grind too deeply into the brick, which could weaken it. After grinding, sweep the wall with a broom to remove any remaining clumps of mortar and dirt. Wear eye protection since mortar particles can fly off as you grind.
When you’re ready to begin repointing, mix up a batch of fresh mortar with a 10-pound bag of Quikrete Mortar Mix and water according to the manufacturer’s instructions. Wear impervious nitrile gloves during the mixing process to prevent contamination and keep your hands clean. When you’re ready to apply the mortar, work from the top of the wall down, working in a straight line. Apply the mortar with a trowel so that it’s about three-quarters of an inch thick at each joint.
If the wall needs more repointing, repeat the process as needed until the wall is complete. Periodically mist the new mortar with water for a few days to help it cure properly.